Our bathroom vent fixture was old, nasty, and not really doing its job at all, so we decided to replace it.

The new (more energy efficient) vent that we bought to replace it doesn't have a light, so its much smaller. Here's how it went.

The new (more energy efficient) vent that we bought to replace it doesn't have a light, so its much smaller. Here's how it went.
Step 1: First we needed appropriate wiring for the vent. Since our home is 100 years old, a lot of the wiring is outdated (still knob and tube) and would make any electrical inspector go into shock (pun intended) when he (or she!) saw it. Any electrician, on the other hand, is used to working in this sort of brutal environment.
We needed to run new wiring up from the basement-- the location of our breaker box. One thing about old houses is that the walls don't usually line up. They come close, but they may be off by even as little as 6 inches. Why not just move the wall over 6 inches and stack them neatly? Who knows... but they didn't. So running wire all the way from the basement to the attic isn't as simple as just picking a wall and fishing it through.
Tim decided that the way to go was in the bathroom near the main sewer stack. This was the closest to being a straight shot, so it seemed like the best idea. We removed the access panel to the shower plumbing and tried to send a fish tape down to the basement.

Turns out it's a straight shot down to a hole cut in the 1st story floor (basement ceiling) for the sewer stack. Also turns out that fish tapes aren't very good at going straight down, especially in houses with lath and plaster walls. Those nasty plaster goobers hanging out on the back side of the wall really like to snag a fish tape.

Turns out it's a straight shot down to a hole cut in the 1st story floor (basement ceiling) for the sewer stack. Also turns out that fish tapes aren't very good at going straight down, especially in houses with lath and plaster walls. Those nasty plaster goobers hanging out on the back side of the wall really like to snag a fish tape.
Try #2 was a wrench tied to a string. Since it was a straight shot down, this worked really well. So now we had a string going from the back of the shower on the second floor to the basement where the vent goes through the ceiling.


Using a careful combination of knots and masking tape, Tim secured the cable to the end of the string, then instructed me to pull it up.

(Tim's note on these two pictures. Above: This picture makes my cable snout tying skills look horrendous. Really it's just the way the string is laying around the cable, and I'm sorry. I can talk about this in more detail later. Below: I would not recommend using masking tape. I couldn't find my electrical tape, and this is what I had to use in the meantime. Use electrical tape. It's a miracle I didn't lose it. In anything other than a pull straight up, I probably would have.)

By God's grace there were no major snags, and we were able to get it all the way up to the bathroom without it disconnecting. We now have cable from the basement to the bathroom. Yay!
Now, how do we get the cable up to the attic? Just run it through the little wall, right? Wrong. There were 3 horizontal studs between the toilet paper dispenser and the ceiling. Again, we ask "Why?" And again we have another unsolved mystery.
What to do? We decided we had no choice but to drill holes through the studs to fish the wire through. But how to we get to the studs, my friend? By cutting several attractive holes in the drywall, of course!


Let's take a moment to discuss what additional projects have come up since we started this one. Since we eliminated a light, we should probably add another one some where else. We decided that a can light over the shower would be quite an affordable luxury, so that was the plan. And while we're at it, why not put one at the other end of the bathroom that does not have a light to call its own? Perhaps near the toilet. Sure, why not?
Now we have some nice holes in our wall, so we need to do some patching with drywall, mud, and tape. And then we have to paint the walls to cover the patching. So we have added:
- put in a shower light
- put in another light
- patching the walls
- painting the walls
and the vent is not even in yet. Awesome.
But back to the project. Tim needed to drill through the ceiling to get the wire up to the attic to the junction box. So he climbed up into the attic with his drill and started drilling, asking me to watch carefully and let him know if his drill started going through the wall behind the shower with the plumbing. The idea was to keep the hole in the ceiling in the wall to keep it concealed. Plus, that's where it needed to be. So with Tim in the attic and me in the bathroom, this is what our conversation sounded like as we yelled through the ceiling:
Tim: Do you see it?
Me: No. You're fine.
Drill, drill, drill.
Tim: Do you see it?
Me: No. You're fine.
Drill, drill, drill.
Tim: Do you see it?
Me: No. You're fine.
Drill, drill, drill.
Tim: Do you see it?
Me: No. You're fine.
Drill, drill, drill.

It happened before anything could be done about it. But it didn't matter, because several more holes were cut into the wall, and one of them was later enlarged so Tim could get the drill in.
Finally, we had the holes drilled so lickety- split, we fished that cable all the way up to the attic for Tim to rework the circuit.
Step 2: Install the vent.
As bedtime (and consequently shower time) was rapidly approaching we had to get the vent in for the night. After removing the old vent, we realized that our new vent was much smaller, so the hole would require patching.
Added to the list:
Added to the list:
- patch ceiling
- paint ceiling
Tim jury-rigged some wood to make a square space the correct size for the vent, and in it went. We then carefully cut the drywall to fill in the space around the vent and realized we had another problem. The drywall was not as thick as the lath and plaster around the edges of the hole. Not to worry!
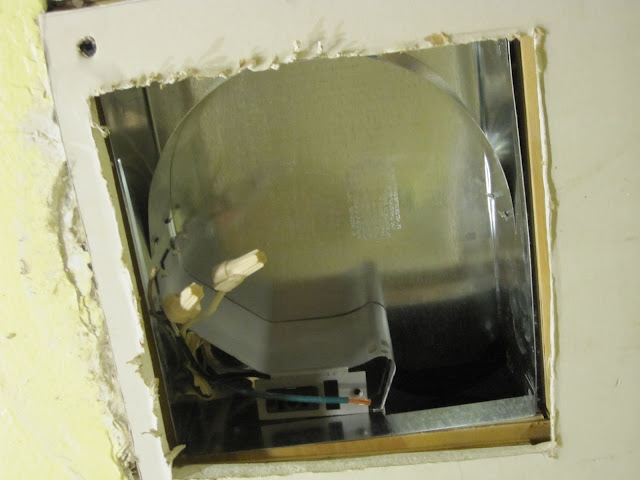
We used some old lath that needed to be removed from the ceiling as shims and screwed that piece of drywall in! It isn't pretty, folks, but its up there. We will worry about smoothing things over when we get to that part.

We used some old lath that needed to be removed from the ceiling as shims and screwed that piece of drywall in! It isn't pretty, folks, but its up there. We will worry about smoothing things over when we get to that part.
Tim wired it to the old switch so we could call it a night. We would re-configure the wiring another day.


Step 3: Wire the circuit for the vent.
Since we would also be adding 2 lights and we wanted everything on its own switch, we had to add another switch box. There was not room between the shower and the door to expand to a 4 switch box, so we added a box to the back of the shower for the shower light and vent switches. Since the current switches were run with 14 gauge wire and we needed 12 gauge, we had to pull out the old stuff. No small task! We soon found out that it had been stapled to the inside of the walls. Agh! Tim can cover this in a separate post if he wants.
The new box was easy-peasy. Tim just pulled the wire down from the junction box in the attic and wired that baby right up. Tada!


And now we have a new vent... and a dark bathroom. While Tim was doing the wiring he decided to add a light switch in the attic instead of having a string pull chain that stretched half way across the attic. And we re-wired the outlet in the hallway that was attached to the same circuit (it is no longer on the circuit to help bring the bathroom up to current code).
For those of you that have made it to the end of this long (and boring) post, I figure you are either one of our dads or PopPop, or you are interested in DIY projects and maybe trying to learn a few things. For your benefit, here are a few things we learned:
- Don't buy and old house. I'm kidding... kinda.
- Fish tapes don't seem to work very well when you need to go straight down through lath and plaster walls. I would recommend the wrench tied to some twine approach.
- Dremels are great for cutting through plaster-- think holes for vents, lights, and switch boxes. It's a 2 step process that includes a tile/plaster bit and a wood bit. This is incredibly messy, so make sure you have the area sealed off and a good respirator (I said RESPIRATOR, not a dust mask) and good goggles. This turns plaster into a fine powder that will get everywhere.
- Set bathroom mats outside the bathroom and clear off counters before breaking into plaster or drywall in any way, shape, or form. It just plain gets everywhere, even if you're not working with a Dremel.
So that's it for the vent project. We figured that as long as we were doing stuff to the bathroom, we may as well replace our toilet that...well... let's just say it doesn't really get the job done. And we need a deadline. Good news--- we have one! Mandy is coming out November 19th-21st to run Living History Farms Race with me! (and Lalaina and Leah and Katie).
So, one project down 4 to go in the upstairs bathroom. Stay tuned for more on those projects.
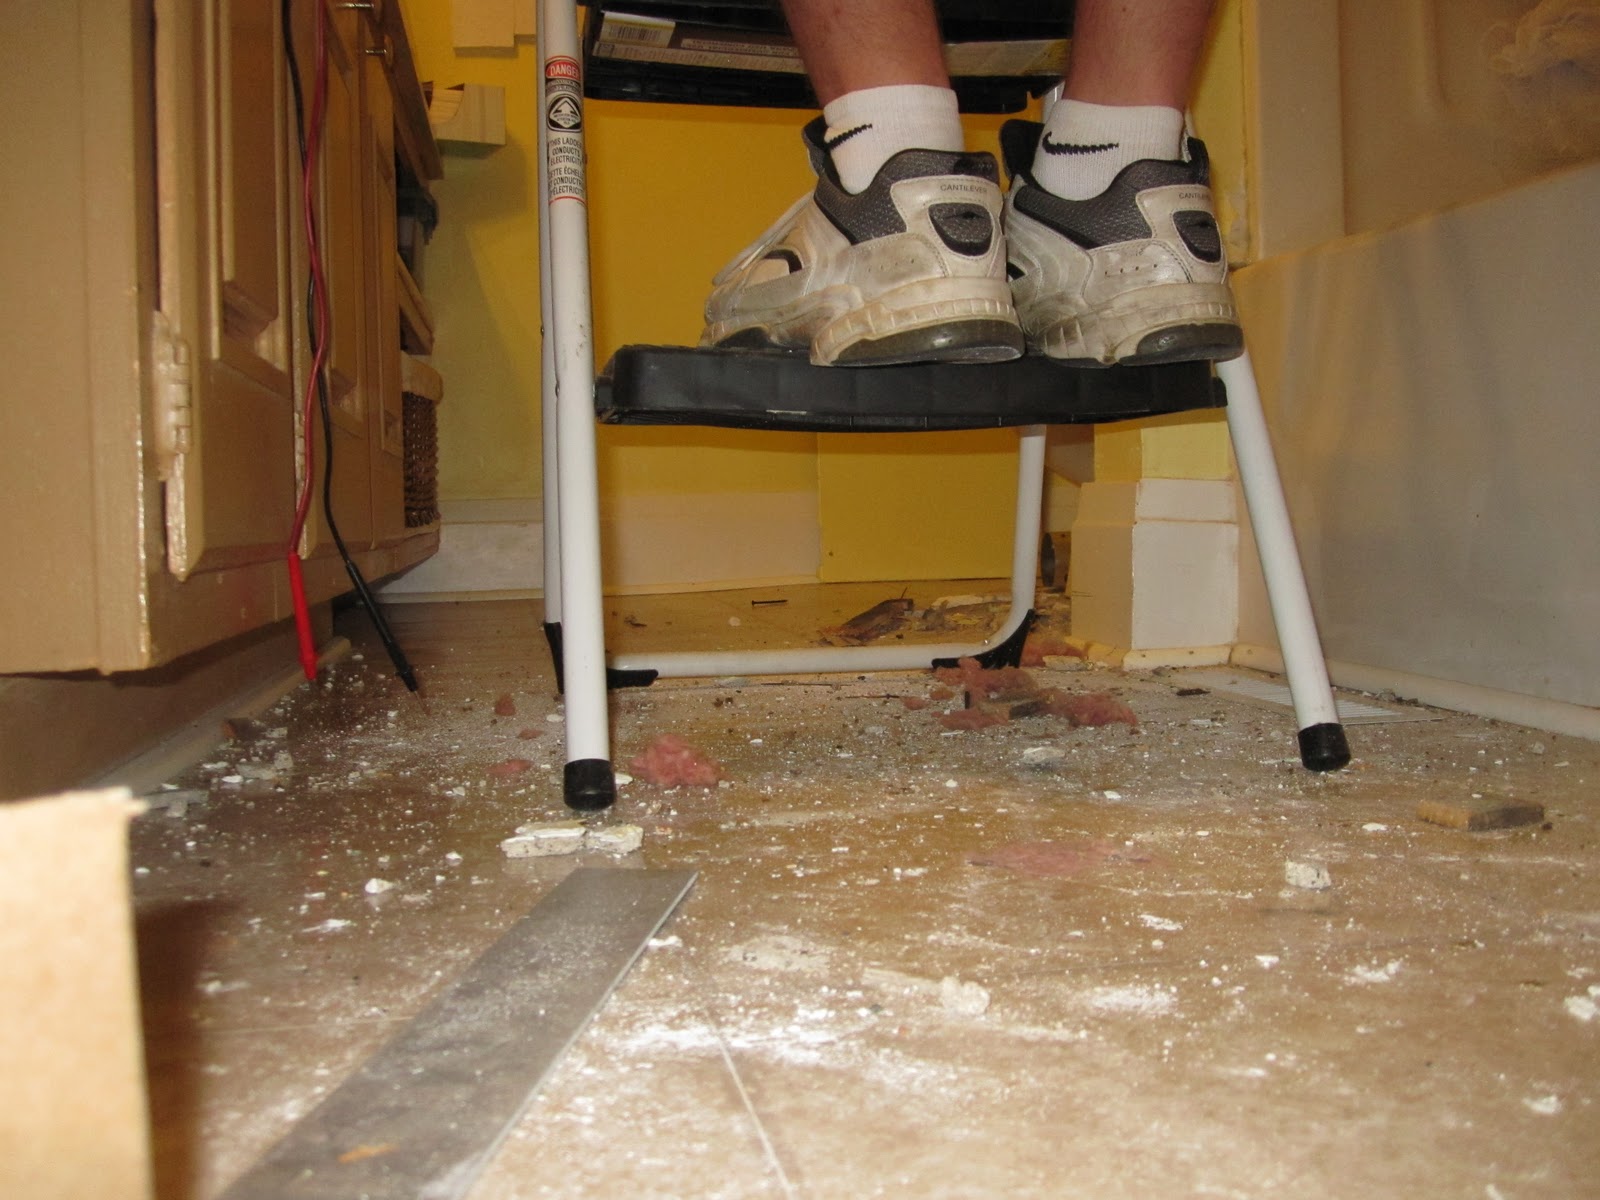
Oh! I almost forgot. Here is the "bonus" material they don't show you in DIY books or magazines or shows. The MESS in between the before and after.
 The saws intermingled with the toothbrushes. The tape measure with the mouthwash. This is real life DIY, people.

The TV shows don't do justice to the boring tedium of try, try, trying again. They don't show how much time you actually sit there deliberating about how to solve the problem.
 Its not just a neat and tidy before and after...


The TV shows don't do justice to the boring tedium of try, try, trying again. They don't show how much time you actually sit there deliberating about how to solve the problem.
I just want to say that I read every word, poured over every picture and laughed alot reading your blog on this bathroom journey!! It brought so many memories of Dad and I doing home improvements that never failed to add at least 12 additional steps than we planned for. It also made me miss you all the more...as we are so far and cannot help you:( If you can love each other during and after a home improvement project, then you can weather any storm together by God's grace!! I love you both and thanks for sharing this wonderful true to life story! I miss hearing all these lovely details to your lives in Iowa!
ReplyDelete